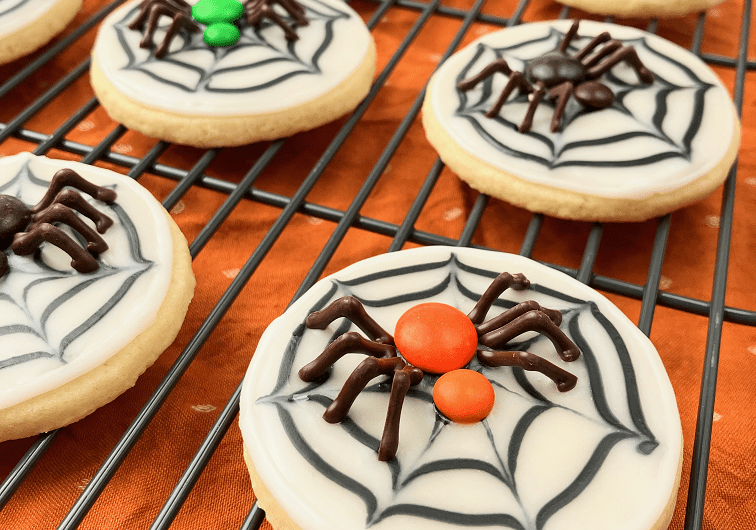
Spider Web Cookies
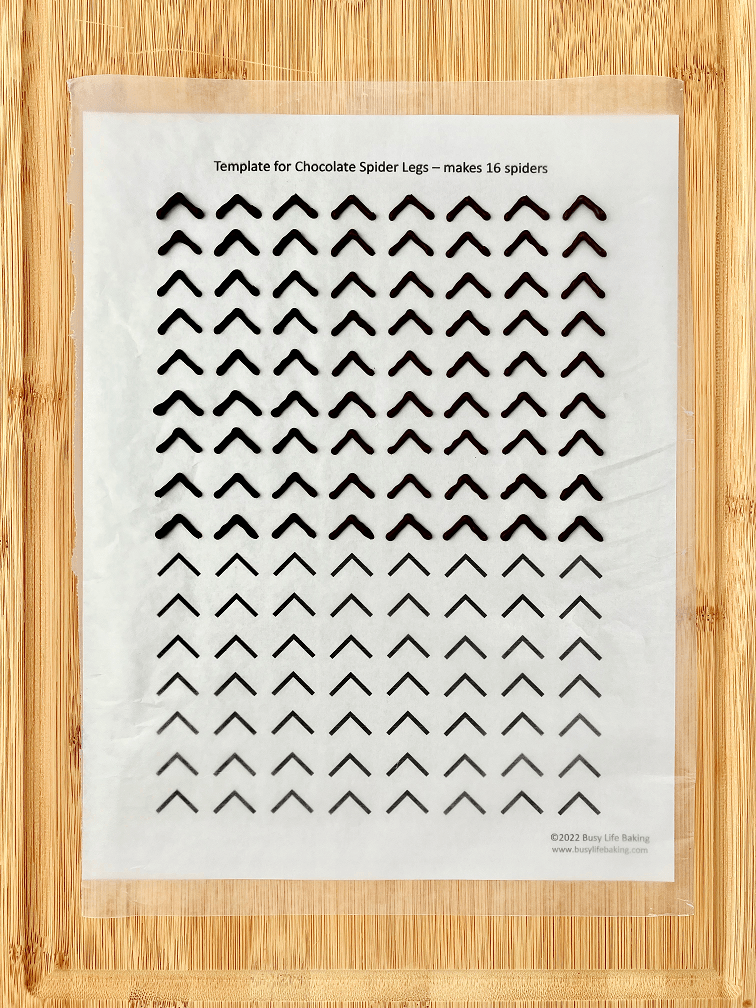
First, bake homemade or pre-made sugar cookie dough in 2.5-inch circles. While the cookies are cooling, make the chocolate spider legs by piping candy melts or melting wafers into ½-inch tall V’s. You can use this printable template with a piece of wax paper taped over it for the most uniform chocolate legs.
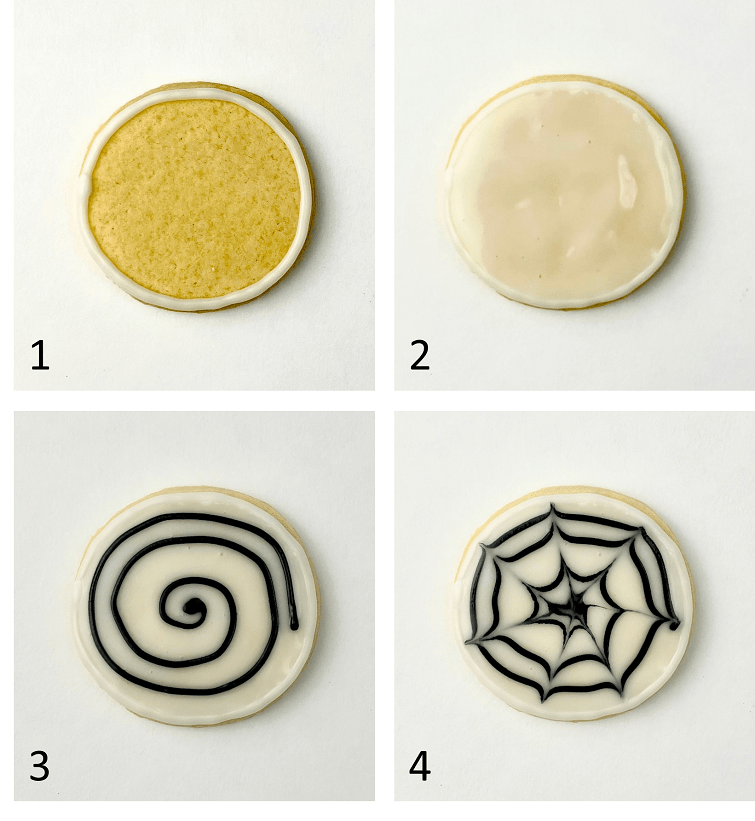
1. Make a thick icing for the border with powdered sugar and water then use a Ziplock bag to pipe a border of icing around each of the cookies.
2. Fill the border with a thinner flooding icing using a knife, offset spatula, or squeeze bottle. (I do steps #2-6 with about 4 cookies at a time).
3. Add the black web icing to another Ziplock bag with a small corner cut off and pipe a swirl.
4. Using a toothpick, start at the center of the cookie and drag out to the border. Repeat about 5-6 more times around the cookie to make a web.
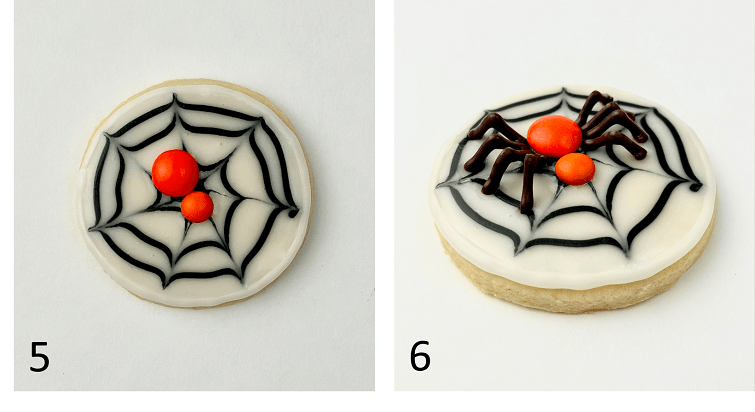
5. Once the piped spider web has dried for about 2-3 minutes, add one regular and one mini M&M to the center of the cookie.
6. Add 4 chocolate legs, standing upright (upside-down V), to each side of the M&Ms. If the legs are falling over, let the icing dry for another 1-2 minutes then try again.
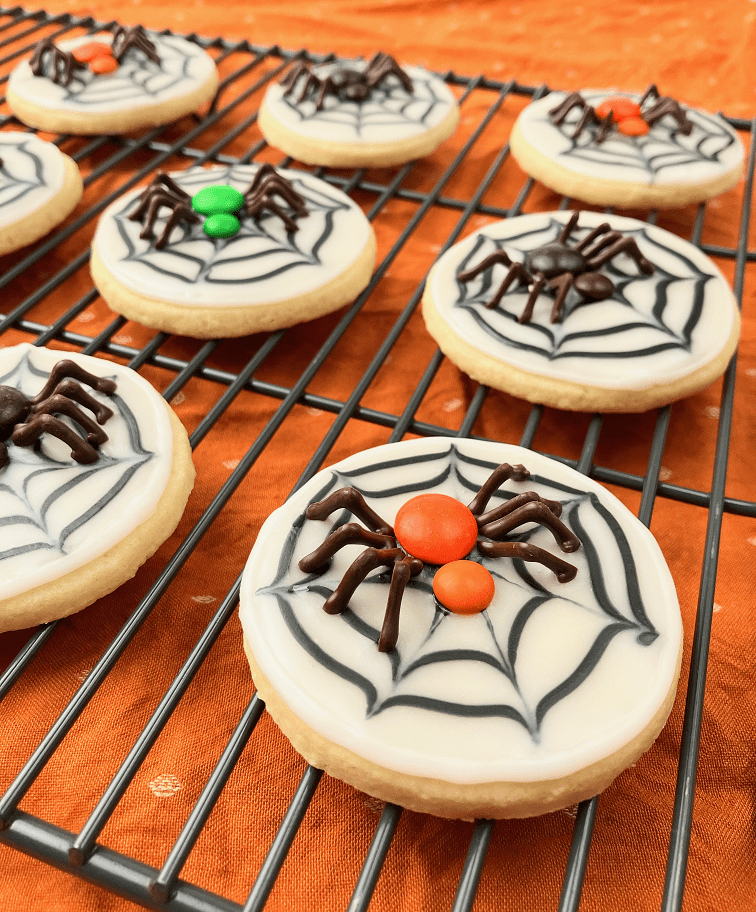
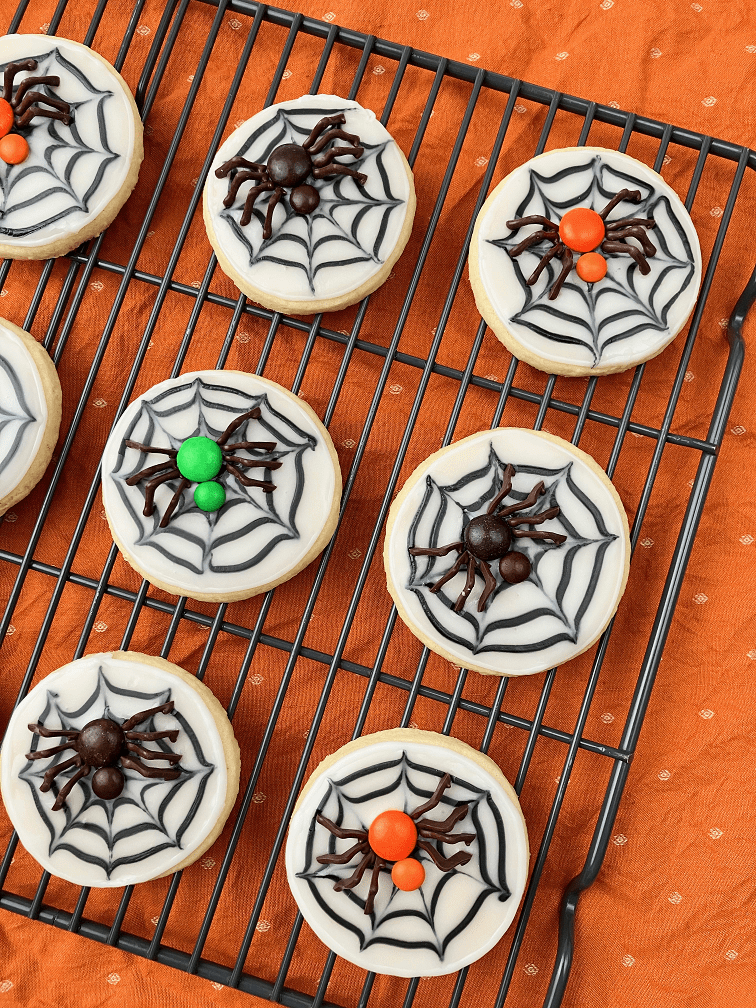
Once the M&Ms and chocolate legs have been added, allow the icing to dry completely then serve or store in a single layer.
Find more recipes:
Spider Web Cookies
22
cookies50
minutes10
minutes1
hour30
minutesCreepy crawly Halloween sugar cookies topped with icing webs and 3D chocolate spiders.
Ingredients
½ recipe homemade sugar cookie dough, chilled at least 1 hour
1 ½ oz chocolate melting wafers or candy melts
Approx 22 regular M&Ms
Approx 22 mini M&Ms
- For the Border/Web Icings
2/3 cup powdered sugar
2 teaspoons water
3-4 drops black gel food coloring
- For the Flood Icing
1 1/2 cups powdered sugar
1 1/2 tablespoons corn syrup
1/2 teaspoon vanilla
4 teaspoons water
Directions
- Roll out cookie dough to about ¼-inch thick then cut into 2.5-inch circles. Bake according to recipe or package directions then cool completely.
- While the cookies are cooling, add chocolate wafers to a microwave-safe bowl and microwave for about 1 minute, stirring every 20 seconds, until smooth.
- Transfer the melted chocolate to a Ziplock bag and cut off a small corner. Pipe ½-inch tall V’s onto a piece of wax paper using this template. You will need 1 ½ sheets for 22 cookies.
- For the Border/Web Icing:
- In a small bowl, mix together 2/3 cup powdered sugar and 2 teaspoons water until smooth. Transfer half to a Ziplock bag.
- To the remaining icing, add 3-4 drops of black gel food coloring and stir until well combined. Transfer to another small Ziplock bag.
- For the Flood Icing:
- In a medium bowl, add powdered sugar, corn syrup, vanilla, and water. Stir until smooth then set aside or transfer to a squeeze bottle, if using.
- For the Assembly
- Cut off a small corner of the bag containing the border icing then pipe a border around each of the cookies.
- Working with about 4 cookies at a time, use a knife or squeeze bottle to fill with the flood icing all the way to the border. Cut off a small corner of the bag containing the black icing then pipe a swirl onto the flood icing. Drag a toothpick from the center outwards, 6-7 times around the cookie, to form the web.
- Let the web dry for about 2-3 minutes then add a regular M&M and a mini M&M to the center of each web. Place 4 chocolate legs upright (upside-down V) on each side of the M&Ms. If the legs are falling over, let the icing dry for another 1-2 minutes then try again.
- Repeat with the remaining cookies. If the flood icing becomes too thick to spread easily, stir in another 1/8 teaspoon water.
- Allow the icing to dry completely then serve or store the cookies in a single layer.
Notes
- Store in a single layer in an airtight container for up to 4 days.
There are no reviews yet. Be the first one to write one.
LEAVE A REPLY
Your email address will not be published.

